Homeschooling Bird Art Project: A Stack of Birds is Flocks of Fun!

Bird Art Project is a stack of 4 fun birds

We have been painting some birds for our latest art project. You can see an Instagram reel about them here.

Homeschooling Bird Art Project

Material:

Acrylic Paint (This is a set of colors but you can buy any extra colors separately. This set includes White, Black, Red, Orange, Navy Blue, Blue, Light Blue, Light Pink, Nutmeg Brown, Yellow, Green, Purple, Bright Pink, Teal, Pewter Grey, Bright Magenta, and Parrot Blue)

Brushes,

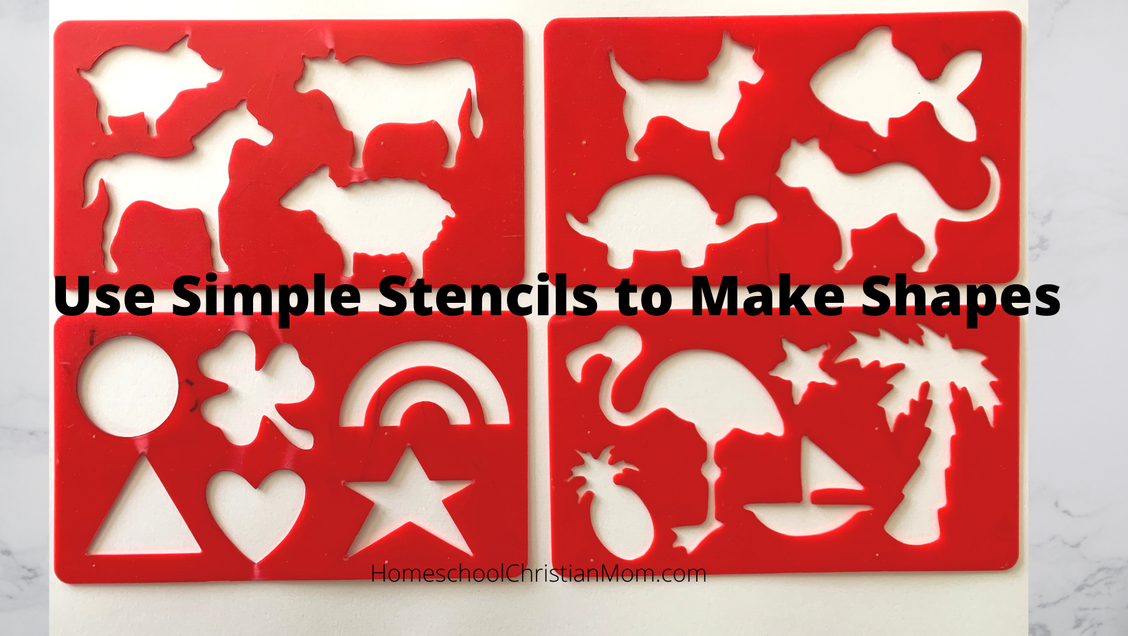
Card Stock or some other heavier paper to make bird patterns,

and a 12 x 12 canvas board.

Have available: a pencil, scissors, water, paper towels, and a craft smock if needed to protect clothes. Blow dryer (optional but helpful).

  1. Paint the background with a light color, mixing white and another color on the board so that you have light vertical streaks. This will make a nice contrast to the round shapes of the birds. Wait till this dries or use a blow dryer to dry it.
  2. Use a heavier paper to cut out 4 birdlike shapes. Arrange these as 4 birds stacked on your board. Remember to leave a small space below each bird body so you can add in the legs later. Lightly pencil around each shape.
  3. Paint each of your birds a different color, adding patterns and details. Add some fun tail feathers to each bird. Use plaids, stripes, dots and feather patterns to make each of your birds unique. Be creative. Get good coverage of your birds and use your brush carefully.
  4. Add in bird legs.
  5. Add a flower on one side.
  6. (optional) At the end, outline your birds in black.
  7. Homeschool Bird Art Project: We are having flocks of fun with this art project!
    Almost done! Good job, Annabella!

    This Bird Art Project Can Teach Us Something

    I used this bird art project to teach my art students that they are unique and special to God. Different facial features, DNA, and  fingerprints all point both to our uniqueness and value to God. We are worth many sparrows, knit together in our mother’s womb, of so much value that God made a way to redeem us.

God says you are Unique

Psalm 139:13-14

13 For You created my innermost parts;
You wove me in my mother’s womb.

14 I will give thanks to You, because [a]I am awesomely and wonderfully made;
Wonderful are Your works,
And my soul knows it very well.

Ephesians 2:10 We are God’s workmanship

10 For we are His workmanship, created in Christ Jesus for good works, which God prepared beforehand so that we would walk in them.

We are redeemed by the precious blood of Christ:

I Peter 1:18 knowing that you were ransomed from the futile ways inherited from your forefathers, not with perishable things such as silver or gold, 19 but with the precious blood of Christ, like that of a lamb without blemish or spot. 20 He was foreknown before the foundation of the world but was made manifest in the last times for the sake of you 21 who through him are believers in God, who raised him from the dead and gave him glory, so that your faith and hope are in God.

Be sure to check out more art projects at HomeschoolChristianMom.com and on my Homeschool Christian Mom Elizabeth Estelle Youtube channel.


© 2023 www.homeschoolchristianmom.com

Let’s connect:

Join me! Homeschool Christian Mom FREE Facebook group with tips on grading, scheduling and more!

Youtube: Homeschool Christian Mom These videos discuss homeschool scheduling, working with your Littles, thinking long term, and many other topics. @homeschoolchristianmom

For additional home schooling support, work with me!

Twitter @hmschchristnmom

Instagram

Do you need some extra homeschooling help? Use this link to get on my calendar and let’s chat! Move from being a hesitant homeschool mom to a happy homeschool family.

Bonus:There are very good boxed all-in-one curriculums out there. I used mainly one curriculum: BJU Press Homeschool curriculum for all my kids K thru 12. It is a Christian curriculum. I knew some people that worked there and we really liked it.

It is a curriculum where the subjects are integrated (like the spelling words are in the reading and science lessons.) You can do parent led where you teach or purchase the DVD’s or get the same material through the computer. For any of those ways, there are recommendations for grading or they do it for you.

I love the BJU curriculum because they have thought of everything. Subjects are well put together, they list tons of extra resources if you need it and all the prep work is done. On day one, you teach lesson one, etc. So the value of that kind of complete curriculum was worth every penny to me. You can see their curriculum HERE.

Homeschool Art Project: Board Book

From Pattern to Board Books

After our pattern unit, we dove right in to a shaped board book art project. Inside our board book, we will add animal silhouettes.

  1. We used a shaped book of a zebra as a pattern for 3 board book pages. Cut this pattern out of bristol board, card stock or some other sturdy paper.
  2. Next we glued colored heavy construction paper on each side of the 3 pages (picture on far right).
  3. Because the front page (the zebra’s head) is smaller than the other 2 pages, make sure you add in the feet and stripes (center picture).
  4. We used a belt punch or heavy hole punch to punch holes at the top. Wiggling the small key rings carefully, we pushed them through the holes so that the book opens easily.
  5. Using markers, add the silhouettes of various animals onto your board book pages. Remember, the more unique shape an animal has, the easier it is to recognize by shape! You can free-hand these drawing or use stencils to help you.

Tip: You can find out more about this art project, and other art projects by joining my FaceBook group Homeschool Christian Mom and by subscribing to my Youtube channel Homeschool Christian Mom Elizabeth Estelle.

What colors and shapes will you choose?

Using markers, color in your animal shapes. You can have pictures on the back of the zebra’s head (page 1), the front and back of page 2, and the front and back of page 3.

Last step: On the back of the book put ©2022 and Your Name.

  • Supplies:
  • Brightly colored heavy construction paper
  • Bristol board
  • Glue sticks or Glue
  • Hole punch
  • Small keys rings or decorative twine
  • Fine-tipped black markers

Frequently Asked Questions:

Can I use this project for younger children? I recommend age 8 and up for this project. For this age group, you will need someone to help them cut out their pages. Also,  I give them the option of using a stencil to draw their animal, drawing it themselves, or I will draw the outline for them and they can just color it in. 

If the student has the scissor skills to cut out their own pages-hooray! I let them.

What if a student draws their animals so they appear upside down in the book? You can leave them that way or replace that page by gluing another piece of construction paper over it.

What if a student draws shapes that are unrecognizable? If the student is happy with his book, I say leave the drawings alone. If a student is unhappy, perhaps they can re-do that page or you can help by adding in a line or two where it is needed.

Do the animal shapes they color in have to be colored only in black? No, they do not! I have seen great animal shapes in all colors and one koala that was pink with black ears. While we usually think of silhouettes as being black, this book can be a fun shape book without each animal shape being black. 

Can you add words to this book?  Sure you can! Some of my students like to name the animals that they have drawn. Example: Elephant. 

Some students like to add text. Example: “The pink pig says Oink.”

How long should this project take? I plan for two, 1 hr. art classes, but this last class it took 3 hours. The students made their books a little extra detailed and so we took the additional time. I find it best not to rush the students if you can help it. 

Tip: Keep each student’s pages together with a clothes pin until the book is tied or ringed together.

Let me know how the project goes at homeschoolchristianmom@gmail.com.

You can also follow me on Instagram @the.elizabeth.estelle

Want to make my day? Subscribe to my Youtube channel @homeschoolchrisitanmom


Bonus:

At our house, we have been able to get outside to rake leaves out of the flower beds and pick up twigs. The sun felt so good and I enjoyed being outside again.

My husband has been teaching through Nehemiah- what an example of leadership. He did his best where he was (the king’s cupbearer), as a motivator of the builders and as a warrior (working AND holding a sword). Let’s remember to be training our children to be leaders as well. Give your children age-appropriate opportunities to tackle a job, help a neighbor, cook dinner or help you teach a class.

The following hymn sounds like the song of the homeschooling mom, doesn’t it?

Hymn: To the Work! by Frannie Crosby

To the work! To the work! We are servants of God;
Let us follow the path that our Master has trod;
With the balm of His counsel our strength to renew,
Let us do with our might what our hands find to do.

  • Refrain:
    Toiling on, toiling on,
    Toiling on, toiling on;
    Let us hope, let us watch,
    And labor till the Master comes.
  1. To the work! To the work! Let the hungry be fed;
    To the fountain of life let the weary be led;
    In the cross and its banner our glory shall be,
    While we herald the tidings, “Salvation is free!”
  2. To the work! To the work! There is labor for all;
    For the kingdom of darkness and error shall fall;
    And the love of our Father exalted shall be,
    In the loud swelling chorus, “Salvation is free!”
  3. To the work! To the work! In the strength of the Lord,
    And a robe and a crown shall our labor reward,
    When the home of the faithful our dwelling shall be,
    And we shout with the ransomed, “Salvation is free!”

Do you need some activities for those wiggly children of yours? Don’t be afraid to include some exercises into your routine!

  • Jumping jacks
  • Windmill Toe Touches
  • Arm Circles (clockwise, counter-clockwise, small and large)
  • Marching in Place
  • Lie on your side leg lifts (right and left sides)
  • Sit-ups

If you have a high schooler that is interested in video editing, be sure and check out this previous article on Sarah Rosendahl. She has a free-lance video editing business and also teaches video editing.

If you need a new dinner idea, make sure you check out my latest recipes at HomeschoolChristianMom.com. This week I add Chicken Thighs: Sun-Dried Tomatoes and Spinach with Pepper Jack Cheese.

And just for fun, here’s a few reels from the past week. I hope you enjoy them! Board Book 1You Have to Be a Saint to Homeschool, and Time to Paint Turtles

Until next time,

Elizabeth Estelle and the Homeschool Christian Mom Team

👫 👧 👧 👦 👧 Mom of 4 strong willed kids 🎨 Art Teach and Momcoach 📚 Love to read! Visit HomeschoolChristianMom.com for more info the.elizabeth.estelle on Instagram

Let’s connect: FB group Homeschool Christian Mom


Homeschooling Art: Pattern Project

This picture is an example of a scene partially rendered with patterns to be used as an example for students.

Regular Moms Can Teach Art!

YOU can teach this art project! Sure you can. . . your students like to do art projects and just need a little nudge in that direction. All of a sudden their creative talents will kick in and wow! some art will be happening.

Project supplies: Bristol board or some other sturdy paper, 8 x 10 size, pencils, erasers, Sharpie or other black markers in regular and fine tip

This pattern project is a nice place to start. It is a 2 week project, a total of about 1 hour each week.

This project starts with some talk about patterns. For the first class, the student is instructed to come up with 12-16 ideas for patterns. We used paper from our copier and drew these with a black marker. My pattern paper looked like this:

Then we chose a subject to draw. For younger students, a fish works well. For older students (4th grade and up), I allow them to choose the object or scene they want to draw. Of course, some ideas will work better than others.

The drawing can be a scene, an object like an ice cream cone, or a vase of flowers. They need to finish the patterns and their drawing in about an hour. This would complete the art class for week one.

Use bristol board or some other sturdy paper cut to 8 by 10 inches for their drawing. They can draw in pencil but then they should go over their lines with a black marker. *See FAQ’s below.

Teaching tip: At this time, use your copier to make two photo copies of their drawing before they start filling in any patterns. One copy is in case they want to start over and the other is in case they want to do a second project with colored markers.

The second class is for filling in their picture with the patterns they have drawn. The second class should last about an hour.

Use permanent black markers in various thicknesses to fill in their drawing with various patterns. I like to use regular Sharpies as well as the fine-tip version.

  • Do they have to use all their patterns? No, but they should use 9-12 patterns.
  • Can they use black and white spaces, too? Yes, I let them.
  • Can they use color? I recommend doing the first project in black and white. If they want to do a second project with color, use the copy of the picture they made. (See teaching tip above.)
  • What if it doesn’t look very good to me? I ask my students, Did you do your best? That’s what God expects! If not, let’s start over.
  • How can this be displayed? You can frame it or cut out the object and mount it on colored construction paper.

Last step: Have each student sign and date their picture: Susie Doe ©2022

Bonus:

I don’t know how your week went but my husband painted our main bathroom this past week. That means it was taken apart, moved around, got new trim and paint and is now being put together. I could say it was an inconvenient week but I’m going to say, “Wow! I love the bathroom with the fresh paint.”

II Corinthians 5:17 Therefore if any man be in Christ, he is a new creature: old things are passed away; behold, all things are become new. Isn’t it wonderful that we are new in Christ? We are not just painted over, but new from the inside out!

New Life in Christ by John W. Peterson

New Life in Christ! Abundant and free!
What glories shine, what joys are mine,
What wondrous blessings I see!
My past with its sin,
The searching and strife,
Forever gone, there’s a bright new dawn!
For in Christ I have found New Life!

Gym idea: The President’s challenge is a good February idea for gym class. With an emphasis on flexibility, strength, and coordination, the tasks for this challenge are different enough from most sport activities to capture students’ interest. You can find more information HERE.

Mom: Help! Any suggestions for activities for the kids to make it through the winter blues of February? or a muddy Spring?

Every. Single. Homeschooling. Mom. is wondering the same things . Seriously can’t wait for spring to get here so we can go outside regularly.

EVERY homeschool mom needs some extra ideas to get through February. Don’t get “blue” like this little pup! Click here for some new ideas to help you!

Bonus: If you or your child (junior or senior) is interested in learning free-lance video editing for weddings, make sure you contact my friend Sarah Rosendahl at SarahRose04@gmail.com to take her class. This class is good for a side-hustle for moms to bring in extra income or for students! If you want more information about Sarah, you can read here.

And just for FUN, here’s a couple of reels from this past week: Let’s RaceGiraffe in the Nursery, and The Puzzle.

If you need some homeschool mindset coaching, let’s chat! Let’s create a plan tailor made for your family. Email me at homeschoolchristianmom@gmail.com.